
Sailboat winches give mechanical advantage when handling lines—primarily sheets and halyards—that carry more load than a person could manage safely. Four main types are:
Single-speed: One gear ratio. Common on smaller or older boats.
Two-speed: Turn the handle one way for fast retrieval. Turn the other way for slower movement with more power. Use high speed to take up loose line quickly, then reverse turning to adjust the line tension.
Self-tailing: A jaw at the top grips the line, allowing one person to crank without another holding the loose tail.
Electric or hydraulic: Useful on larger boats, but still handle the line with care. Electric winches can injure crew or damage gear before the operator realizes that something has jammed.
Using
a winch
Line wraps around the drum of the winch, creating friction. You then pull lightly on the free end, or tail, of the line while turning the handle. Internal gears multiply the force. Wrap loose line clockwise two or three times around the drum before taking up any load. Add more wraps as the load increases.On most winches, the line is led upward to the bottom of the drum and winds upward. If it’s a self-tailer, the final turn goes into the gripping jaws. During a tack or gybe:
- Wind two or three loops of the new working sheet around the leeward winch before starting to turn it.
- Release the old working sheet from the windward winch as the jib starts to luff and sheet tension drops.
- Crank the new sheet in quickly by hand while it still has little load.
- When the sail fills, add a wrap around the drum if needed.
- Crank the sheet in to its final position.
- Keep the loose end in the self-tailer or secure it on a cleat.
Getting most of the sheet wound in before the sail fills on the new tack saves a lot of grinding.
On a loaded winch, do not remove the wraps of line all at once. Keep the tail always under control. Lift it out of the self-tailer and ease it slowly while the drum’s friction carries most of the load.
If a line overrides, with one turn on top of and trapping another, do not pull harder or put your fingers into the turns. Remove the load, if possible, or use another winch and a spare line to take tension off of the jammed line.
Important
winch safety
rules
- Keep fingers, loose clothing, hair, and jewelry away from the drum and self-tailer.
- Never allow the line to wrap around your hand, wrist, or body.
- Use an open hand when tailing. Do not grip the loose end of a loaded line with a closed fist. Run it between your thumb and forefinger with your open palm on top of the winch. If a finger gets trapped between the line and the drum, you are likely to lose it.
- Stand out of the direct path of a heavily loaded line, lest it break and fly back.
- Remove the handle when finished so it cannot spin or be knocked overboard.
- Never use an electric winch unless you can see both the line and the source of the load.
- Stop immediately if the load rises unexpectedly. Something might be caught or the sail might already be fully hoisted.
Sheets can carry very large loads. Proper wraps and careful easing matter more than raw strength.
Winch
maintenance
A sailboat winch should be disassembled, cleaned, inspected, and lubricated . . .- once a year under ordinary use
- twice a year (or more often) in salt water, after heavy use, or in tropical conditions
- immediately if the winch feels stiff, sounds gritty, slips backward, or fails to change speeds reliably.
The main goal of periodic maintenance is to grease the gears and bearings lightly and use light machine oil—not grease—on the pawls and pawl springs. Grease can make pawls stick, allowing the winch to slip backward under load. You will need:
- The manufacturer’s service manual (important)
- Winch grease
- Light machine or winch oil
- Mineral spirits or another manufacturer-approved cleaner
- Small brush or toothbrush
- Rags, gloves, and small containers
- Screwdrivers, allen wrenches, circlip (ie, snap ring) pliers, and other tools as appropriate
- Replacement pawl springs, if needed (generally they are)
In the bottom of a cardboard box, cut a round hole precisely the diameter of the winch. Place the box around the winch while working to catch springs, pawls, and circlips before they go overboard.

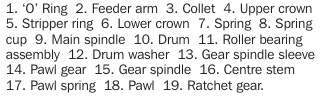
1. Take pictures before and during disassembly. Lay the components out in removal order and orientation. Winches contain thrust washers, spacers, gears, and pawls that must all return to their proper places.
2. Remove the drum. How it comes off varies by brand. It might have a screw under the handle socket, a top cap, or a retaining clip or circlip. Drape a cloth over the winch to catch any parts that might fly out.
3. Lift the drum straight upward. Be prepared for washers or bearing cages underneath it. Never force the drum; consult a parts diagram for the exact model of winch if the drum fails to release easily.
4. Gradually disassemble the gears, removing only one assembly at a time and laying them out in sequence. Photograph each layer before proceeding. Avoid disturbing parts that do not need to be serviced. Be especially careful with the tiny pawl springs that can jump out and vanish.
5. Clean the parts. Remove old, hardened grease and salt deposits from gear teeth and shafts, bearings and their cages, pawls and pawl pockets, and the inside of the drum. Use a brush and suitable solvent. Do not soak seals or plastic parts in solvent unless the manufacturer says to. Wipe everything clean and allow the solvent to evaporate.
6. Inspect everything while looking for:
- Chipped, rounded, or badly worn gear teeth
- Bent or cracked pawls
- Weak, corroded, or broken pawl springs
- Cracked plastic bearing cages
- Scored shafts or bushings
- Excessive corrosion
- Loose mounting bolts
- Damage to the self-tailing jaws
Pawls should pivot freely and snap firmly into engagement. Their springs are not costly, so replace any that are questionable.
7. Lubricate sparingly. Apply a thin film of winch grease to:
- Gear teeth
- Shafts and bushings
- Roller bearings
- Sliding and bearing surfaces specified by the manufacturer
Apply only a few drops of light oil to pawls, their springs and their pivot points.
Do not pack the winch with grease. Excess grease attracts dirt, creates drag, and can migrate into the pawls.
Reinstall everything in the correct order and orientation. Before applying a load:
- Turn the drum by hand.
- Confirm that it rotates freely in the working direction.
- Confirm a clear and regular clicking sound.
- Ensure that it locks immediately against reverse rotation.
- Test both speeds on a two-speed winch.
- Confirm that the self-tailer is secure.
Clean the drum with fresh water and mild soap. Do not polish or lubricate the line-gripping surface that needs friction. Inspect the base for water intrusion and occasionally check the deck-mounting fasteners and backing plate.
Do not spray penetrating oil into an assembled winch as a substitute for servicing. It can wash lubricant away, spread dirt through the mechanism, and mask a sticking pawl.